yii2-module-backup 


Этот файл доступен на русском языке.
This module helps to create and restore backups of databases and files stored on disk. It has web-interface, console commands, and REST-API for remote control. It also supports io-priority settings and has flexible configuration options. To work independently of the application database, this module uses its sqlite database in the backup folder.
Creating and restoring database backups is possible for MySQL and [PostgreSQL] (https://www.postgresql.org/). To do this, you must have the console client installed on the system for your database type. After a series of experiments, it became clear that creating and restoring databases best using their native clients.
i18n 
Now, this module supports English and Russian languages.
Installation 
To add this module to your app, just run:
`bash
$ composer require floor12/yii2-module-backup
or add this to the `require` section of your composer.json.
json
"floor12/yii2-module-backup": "dev-master"
`
After that, include minimal module configuration in modules section of application config:
`php
'modules' => [
        'backup' =>  [
            'class' => 'floor12\backup\Module',
            'backupFolder' => '/mnt/raid10/backups',
            'administratorRoleName' => '@',
            'configs' => [
                'mysql_db' => [
                    'type' => BackupType::DB,
                    'title' => 'Mysql Database',
                    'connection' => 'db',  // component from app config, usually 'db'
                    'limit' => 0
                ],
                'postgres_db' => [
                    'type' => BackupType::DB,
                    'title' => 'PostgresQL database',
                    'connection' => 'example_connection_name', // component from app config, usually 'db'
                    'io' => IOPriority::REALTIME,
                    'limit' => 0
                ],
                'user_files_backup' => [
                    'type' => BackupType::FILES,
                    'title' => 'User uploaded files',
                    'path' => '@app/user_files',
                    'io' => IOPriority::IDLE,
                    'limit' => 0
                ]
            ]
        ]
    ]
 ...
`
These parameters is possible to set up:
administratorRoleName- role to access web controllerbackupFolder- path or alias to the place where the backups are stored (default is @app/backups)chmod- if this param has value, the new backup file will change mode after creationauthTokens- array of auth tokens to use REST-API of the moduleadminLayout- it will change defaultmainlayout to something you need (if your admin panel has different base layout)
And the main and required param is configs - it`s an associative array of your backup configurations (folders and databases).
Each backup item mast have these elements to set:
- a backup identifier as an array key, contains only letters and numbers without space;
type- type backup: disk or database;title- human-readable backup item title to show in the admin interface;limit- how many backup copies keep before delete (0- never delete old copies);io- input/output hdd priority, usefloor12\backup\models\IOPriorityconstants to keep it confabulated. Default value isIOPriority::IDLE;connection- in case of database backup, connection name in Yii2 config;path- in case of disk backup, the path to store backup files;
Usage 
WEB interface 
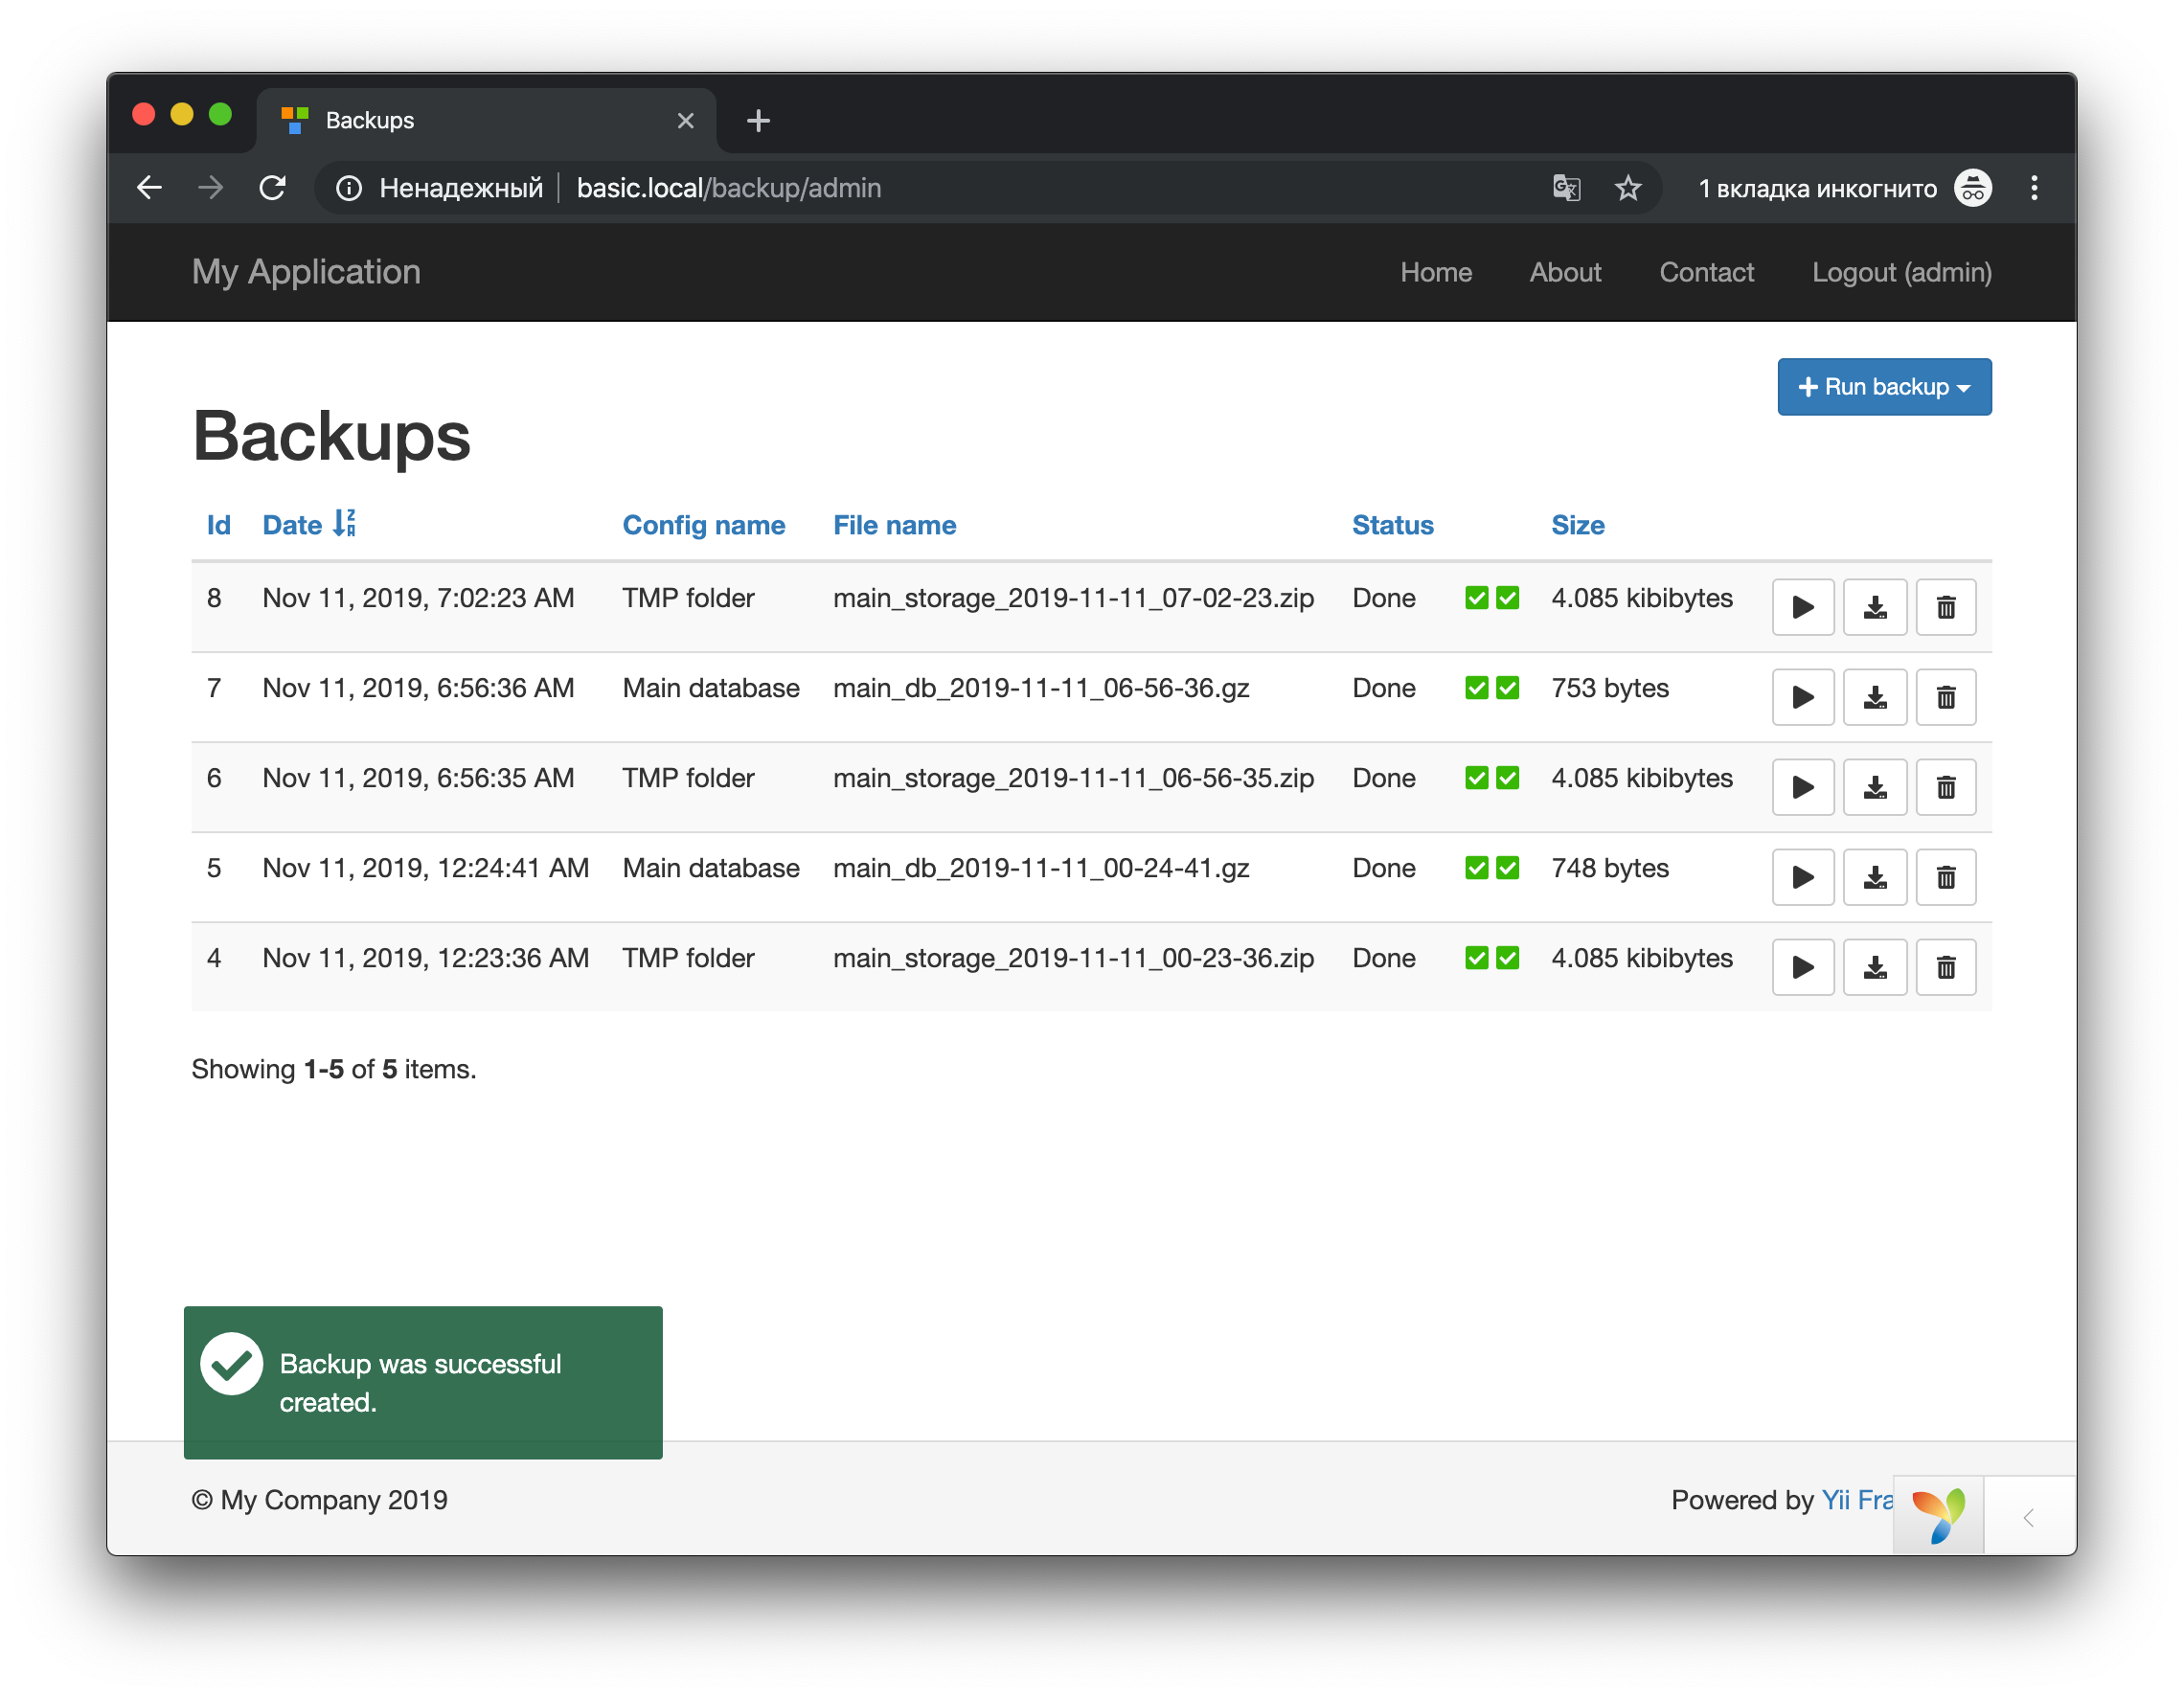
This module has a web controller to work with backups. Go to backup/admin or backup/admin/index to create, delete, restore and download
backups.
### Console interface
To list all existing backups run
`bash
$ ./yii backup/console/index
`
To create config run
`bash
$ ./yii backup/console/create
`
backup_config_id is backup item identifier from module configuration.
To restore config run
`bash
$ ./yii backup/console/restore
`
backup_id is identifier of backup stored in sqlite database
REST-api 
By default, rest controller takes place on the route /backup/api.
To get access to it, add header Backup-Auth-Token to request with one of the tokens stored in application config in the module section
(param authTokens);
Get list of backups 
GET /backup/api/index
This is useful to remote backup checks from some dashboard with a few projects.
Response example:
`json
[
{
"id": 8,
"date": "2019-11-11 07:02:23",
"status": 1,
"type": 1,
"config_id": "main_storage",
"config_name": "TMP folder",
"filename": "main_storage_2019-11-11_07-02-23.zip",
"size": 4183
}, {
"id": 7,
"date": "2019-11-11 06:56:36",
"status": 1,
"type": 0,
"config_id": "main_db",
"config_name": "Main database",
"filename": "main_db_2019-11-11_06-56-36.gz",
"size": 753
},
]
`
Create new backup 
POST /backup/api/backup?config_id=<backup_config_id>
Succes respons example:
`json
{"result":"success"}
`
Restore from backup 
POST /backup/api/restore?id=<backup_id>
Succes respons example:
`json
{"result":"success"}
`
Delete backup 
DELETE /backup/api/delete?id=<backup_id>
Succes respons example:
`json
{"result":"success"}
`
Get backup file 
GET /backup/api/get?id=<backup_id>
This request will return backup archive with requested ID.
 floor12
If you have any questions, please ask in the forum instead.
Signup or Login in order to comment.