The Definitive Guide to Yii 2.0
10 followers
Working with Forms 
This section describes how to create a new page with a form for getting data from users. The page will display a form with a name input field and an email input field. After getting those two pieces of information from the user, the page will echo the entered values back for confirmation.
To achieve this goal, besides creating an action and two views, you will also create a model.
Through this tutorial, you will learn how to:
- create a model to represent the data entered by a user through a form,
- declare rules to validate the data entered,
- build an HTML form in a view.
Creating a Model 
The data to be requested from the user will be represented by an EntryForm model class as shown below and
saved in the file models/EntryForm.php. Please refer to the Class Autoloading
section for more details about the class file naming convention.
<?php

namespace app\models;

use Yii;
use yii\base\Model;

class EntryForm extends Model
{
    public $name;
    public $email;

    public function rules()
    {
        return [
            [['name', 'email'], 'required'],
            ['email', 'email'],
        ];
    }
}
The class extends from yii\base\Model, a base class provided by Yii, commonly used to represent form data.
Info: yii\base\Model is used as a parent for model classes not associated with database tables. yii\db\ActiveRecord is normally the parent for model classes that do correspond to database tables.
The EntryForm class contains two public members, name and email, which are used to store
the data entered by the user. It also contains a method named rules(), which returns a set
of rules for validating the data. The validation rules declared above state that
- both the
nameandemailvalues are required - the
emaildata must be a syntactically valid email address
If you have an EntryForm object populated with the data entered by a user, you may call
its validate() method to trigger the data validation routines. A data validation
failure will set the hasErrors property to true, and you may learn what validation
errors occurred through errors.
<?php
$model = new EntryForm();
$model->name = 'Qiang';
$model->email = 'bad';
if ($model->validate()) {
    // Good!
} else {
    // Failure!
    // Use $model->getErrors()
}
Creating an Action 
Next, you'll need to create an entry action in the site controller that will use the new model. The process
of creating and using actions was explained in the Saying Hello section.
<?php

namespace app\controllers;

use Yii;
use yii\web\Controller;
use app\models\EntryForm;

class SiteController extends Controller
{
    // ...existing code...

    public function actionEntry()
    {
        $model = new EntryForm();

        if ($model->load(Yii::$app->request->post()) && $model->validate()) {
            // valid data received in $model

            // do something meaningful here about $model ...

            return $this->render('entry-confirm', ['model' => $model]);
        } else {
            // either the page is initially displayed or there is some validation error
            return $this->render('entry', ['model' => $model]);
        }
    }
}
The action first creates an EntryForm object. It then tries to populate the model
with the data from $_POST, provided in Yii by yii\web\Request::post().
If the model is successfully populated (i.e., if the user has submitted the HTML form), the action will call
validate() to make sure the values entered are valid.
Info: The expression
Yii::$apprepresents the application instance, which is a globally accessible singleton. It is also a service locator that provides components such asrequest,response,db, etc. to support specific functionality. In the above code, therequestcomponent of the application instance is used to access the$_POSTdata.
If everything is fine, the action will render a view named entry-confirm to confirm the successful submission
of the data to the user. If no data is submitted or the data contains errors, the entry view will
be rendered, wherein the HTML form will be shown, along with any validation error messages.
Note: In this very simple example we just render the confirmation page upon valid data submission. In practice, you should consider using refresh() or redirect() to avoid form resubmission problems.
Creating Views 
Finally, create two view files named entry-confirm and entry. These will be rendered by the entry action,
as just described.
The entry-confirm view simply displays the name and email data. It should be stored in the file views/site/entry-confirm.php.
<?php
use yii\helpers\Html;
?>
<p>You have entered the following information:</p>

<ul>
    <li><label>Name</label>: <?= Html::encode($model->name) ?></li>
    <li><label>Email</label>: <?= Html::encode($model->email) ?></li>
</ul>
The entry view displays an HTML form. It should be stored in the file views/site/entry.php.
<?php
use yii\helpers\Html;
use yii\widgets\ActiveForm;
?>
<?php $form = ActiveForm::begin(); ?>

    <?= $form->field($model, 'name') ?>

    <?= $form->field($model, 'email') ?>

    <div class="form-group">
        <?= Html::submitButton('Submit', ['class' => 'btn btn-primary']) ?>
    </div>

<?php ActiveForm::end(); ?>
The view uses a powerful widget called ActiveForm to
build the HTML form. The begin() and end() methods of the widget render the opening and closing
form tags, respectively. Between the two method calls, input fields are created by the
field() method. The first input field is for the "name" data,
and the second for the "email" data. After the input fields, the yii\helpers\Html::submitButton() method
is called to generate a submit button.
Trying it Out 
To see how it works, use your browser to access the following URL:
https://hostname/index.php?r=site%2Fentry
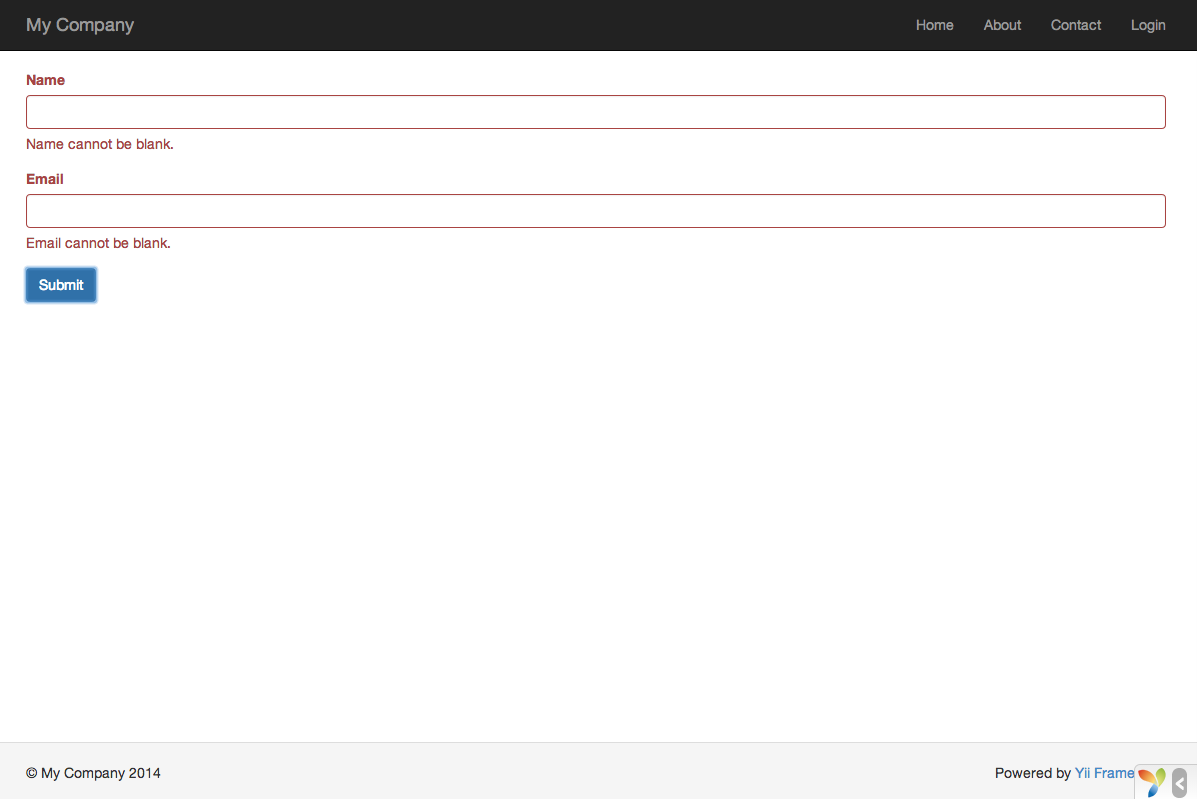
You will see a page displaying a form with two input fields. In front of each input field, a label indicates what data is to be entered. If you click the submit button without entering anything, or if you do not provide a valid email address, you will see an error message displayed next to each problematic input field.
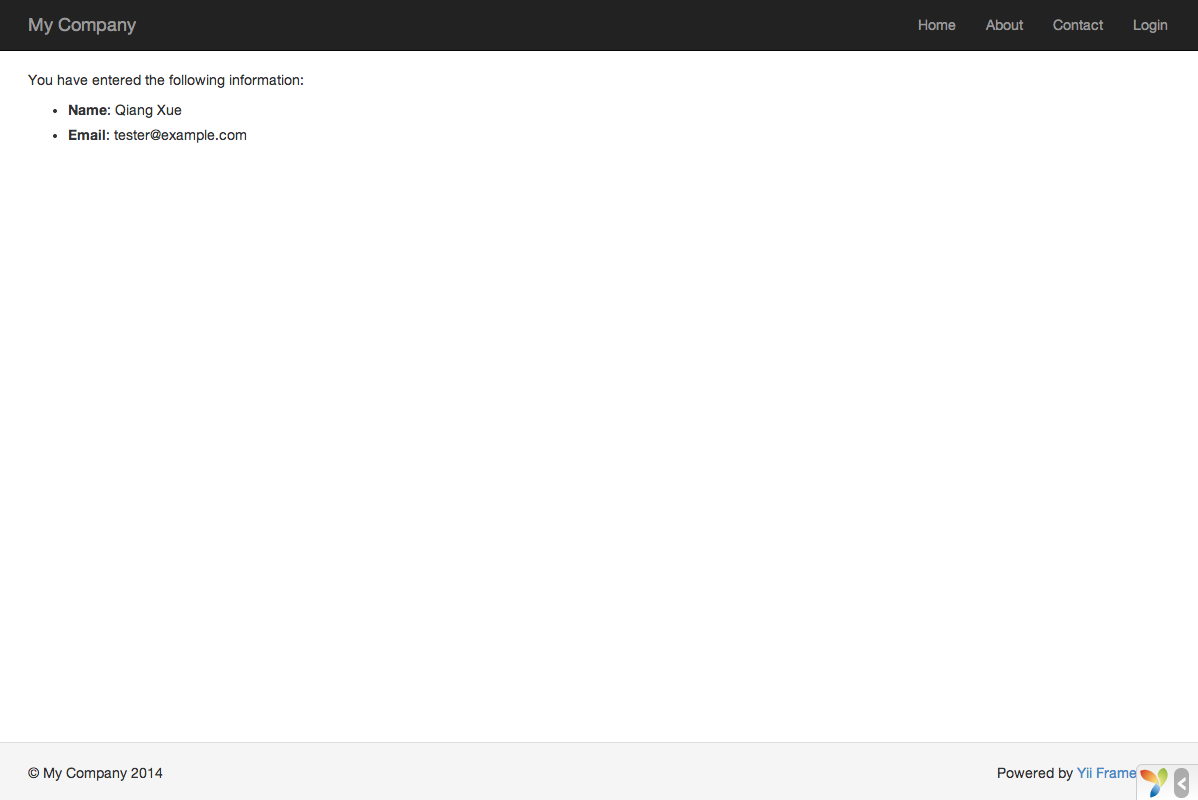
After entering a valid name and email address and clicking the submit button, you will see a new page displaying the data that you just entered.
Magic Explained 
You may wonder how the HTML form works behind the scene, because it seems almost magical that it can display a label for each input field and show error messages if you do not enter the data correctly without reloading the page.
Yes, the data validation is initially done on the client-side using JavaScript, and secondarily performed on the server-side via PHP.
yii\widgets\ActiveForm is smart enough to extract the validation rules that you have declared in EntryForm,
turn them into executable JavaScript code, and use the JavaScript to perform data validation. In case you have disabled
JavaScript on your browser, the validation will still be performed on the server-side, as shown in
the actionEntry() method. This ensures data validity in all circumstances.
Warning: Client-side validation is a convenience that provides for a better user experience. Server-side validation is always required, whether or not client-side validation is in place.
The labels for input fields are generated by the field() method, using the property names from the model.
For example, the label Name will be generated for the name property.
You may customize a label within a view using the following code:
<?= $form->field($model, 'name')->label('Your Name') ?>
<?= $form->field($model, 'email')->label('Your Email') ?>
Info: Yii provides many such widgets to help you quickly build complex and dynamic views. As you will learn later, writing a new widget is also extremely easy. You may want to turn much of your view code into reusable widgets to simplify view development in future.
Summary 
In this section of the guide, you have touched every part in the MVC architectural pattern. You have learned how to create a model class to represent the user data and validate said data.
You have also learned how to get data from users and how to display data back in the browser. This is a task that could take you a lot of time when developing an application, but Yii provides powerful widgets to make this task very easy.
In the next section, you will learn how to work with databases, which are needed in nearly every application.
Found a typo, or you think this page needs improvement?
Edit it on GitHub !
Signup or Login in order to comment.