המדריך המלא לפיתוח אפליקציות מתקדמות בעזרת Yii 1.0.
0 follower
Creating First Yii Application
To get an initial experience with Yii, we describe in this section how to
create our first Yii application. We will use the powerful yiic tool
which can be used to automate code creation for certain tasks. For convenience,
we assume that YiiRoot is the directory where Yii is installed, and WebRoot
is the document root of our Web server.
Run yiic on the command line as follows:
% YiiRoot/framework/yiic webapp WebRoot/testdrive
Note: When running
yiicon Mac OS, Linux or Unix, you may need to change the permission of theyiicfile so that it is executable. Alternatively, you may run the tool as follows,% cd WebRoot/testdrive % php YiiRoot/framework/yiic.php webapp WebRoot/testdrive
This will create a skeleton Yii application under the directory
WebRoot/testdrive. The application has a directory structure that is
is needed by most Yii applications.
Without writing a single line of code, we can test drive our first Yii application by accessing the following URL in a Web browser:
http://hostname/testdrive/index.php
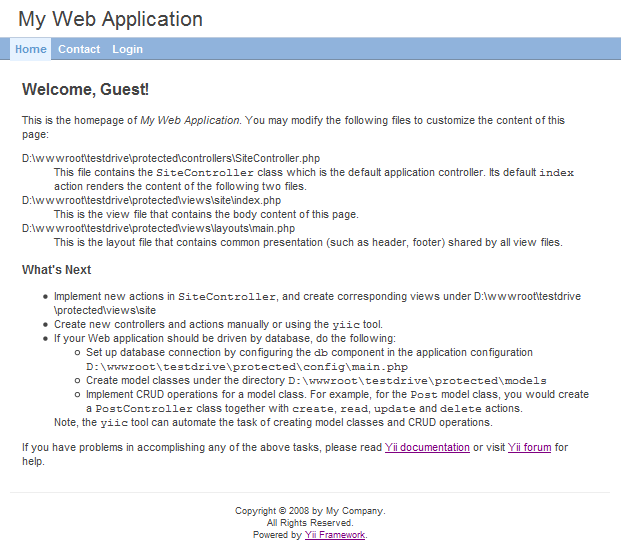
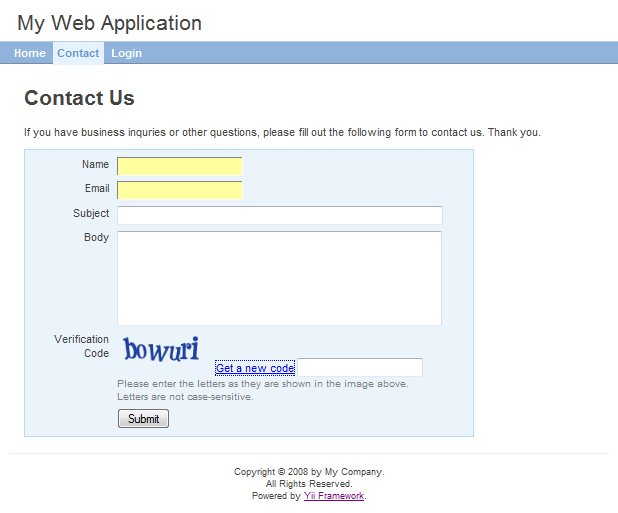
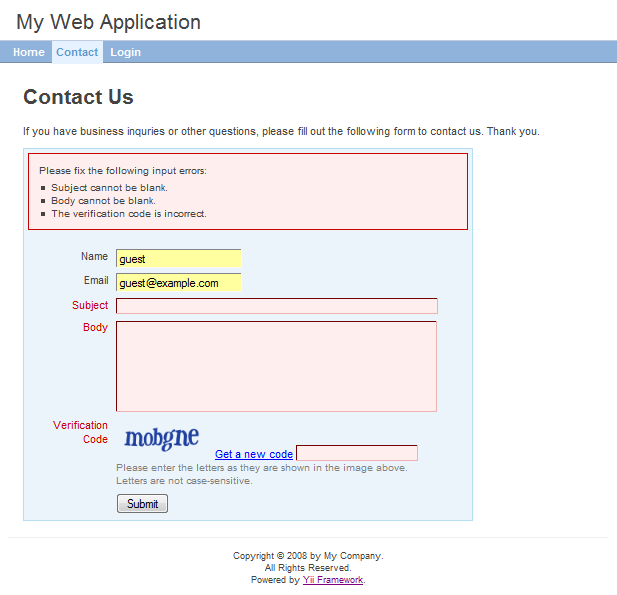
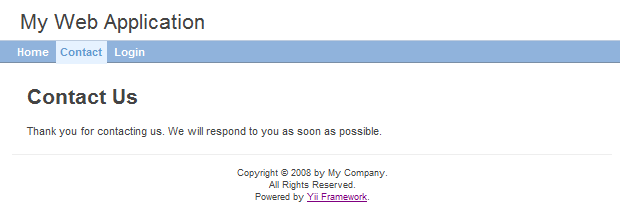
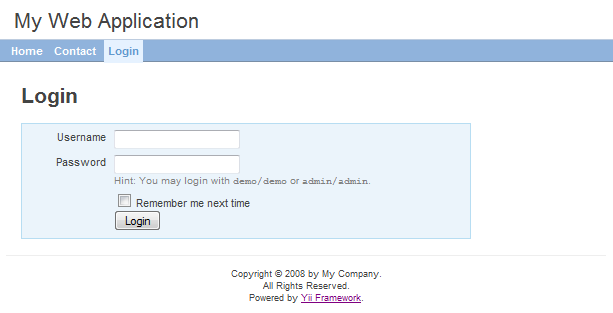
As we can see, the application has three pages: the homepage, the contact page and the login page. The homepage shows some information about the application as well as the user login status, the contact page displays a contact form that users can fill in to submit their inquiries, and the login page allows users to be authenticated before accessing privileged contents. See the following screenshots for more details.
Home page
Contact page
Contact page with input errors
Contact page with success
Login page
The following diagram shows the directory structure of our application. Please see Conventions for detailed explanation about this structure.
testdrive/
   index.php                 Web application entry script file
   assets/                   containing published resource files
   css/                      containing CSS files
   images/                   containing image files
   themes/                   containing application themes
   protected/                containing protected application files
      yiic                   yiic command line script
      yiic.bat               yiic command line script for Windows
      commands/              containing customized 'yiic' commands
         shell/              containing customized 'yiic shell' commands
      components/            containing reusable user components
         MainMenu.php        the 'MainMenu' widget class
         Identity.php        the 'Identity' class used for authentication
         views/              containing view files for widgets
            mainMenu.php     the view file for 'MainMenu' widget
      config/                containing configuration files
         console.php         the console application configuration
         main.php            the Web application configuration
      controllers/           containing controller class files
         SiteController.php  the default controller class
      extensions/            containing third-party extensions
      messages/              containing translated messages
      models/                containing model class files
         LoginForm.php       the form model for 'login' action
         ContactForm.php     the form model for 'contact' action
      runtime/               containing temporarily generated files
      views/                 containing controller view and layout files
         layouts/            containing layout view files
            main.php         the default layout for all views
         site/               containing view files for the 'site' controller
            contact.php      the view for 'contact' action
            index.php        the view for 'index' action
            login.php        the view for 'login' action
         system/             containing system view files
1. Connecting to Database 
Most Web applications are backed by databases. Our test-drive application
is not an exception. To use a database, we first need to tell the
application how to connect to it. This is done by changing the application
configuration file WebRoot/testdrive/protected/config/main.php, as shown
below:
return array(
    ......
    'components'=>array(
        ......
        'db'=>array(
            'connectionString'=>'sqlite:protected/data/source.db',
        ),
    ),
    ......
);
In the above, we add a db entry to components, which instructs the
application to connect to the SQLite database
WebRoot/testdrive/protected/data/source.db when needed.
Note: To use Yii's database feature, we need to enable PHP PDO extension and the driver-specific PDO extension. For the test-drive application, we would need the
php_pdoandphp_pdo_sqliteextensions to be turned on.
To this end, we need to prepare a SQLite database so that the above configuration can be effective. Using some SQLite admin tool, we can create a database with the following schema:
CREATE TABLE User (
    id INTEGER NOT NULL PRIMARY KEY AUTOINCREMENT,
    username VARCHAR(128) NOT NULL,
    password VARCHAR(128) NOT NULL,
    email VARCHAR(128) NOT NULL
);
Note: If you are using MySQL database, you should replace
AUTOINCREMENTwithAUTO_INCREMENTin the above SQL.
For simplicity, we only create a single User table in our database. The
SQLite database file is saved as
WebRoot/testdrive/protected/data/source.db. Note that both the file and the
containing directory must be made writable by the Web server process, as
required by SQLite.
2. Implementing CRUD Operations 
Now is the fun part. We would like to implement the CRUD (create, read,
update and delete) operations for the User table we just created. This is
also commonly needed in practical applications.
Instead of taking trouble to write actual code, we would use the powerful
yiic tool again to automatically generate the code for us. This
process is also known as scaffolding. Open a command line window, and execute
the commands listed as follows,
% cd WebRoot/testdrive
% protected/yiic shell
Yii Interactive Tool v1.0
Please type 'help' for help. Type 'exit' to quit.
>> model User
   generate User.php

The 'User' class has been successfully created in the following file:
    D:\wwwroot\testdrive\protected\models\User.php

If you have a 'db' database connection, you can test it now with:
    $model=User::model()->find();
    print_r($model);

>> crud User
   generate UserController.php
   mkdir D:/wwwroot/testdrive/protected/views/user
   generate create.php
   generate update.php
   generate list.php
   generate show.php
   generate admin.php
   generate _form.php

Crud 'user' has been successfully created. You may access it via:
http://hostname/path/to/index.php?r=user
In the above, we use the yiic shell command to interact with our
skeleton application. At the prompt, we execute two sub-commands: model User
and crud User. The former generates a model class for the User table,
while the latter reads the User model and generates the code implementing
the CRUD operations.
Note: You may encounter errors like "...could not find driver", even though the requirement checker shows you have already enabled PDO and the corresponding PDO driver. If this happens, you may try to run the
yiictool as follows,% php -c path/to/php.ini protected/yiic.php shellwhere
path/to/php.inirepresents the correct PHP ini file.
Let's enjoy our work by browsing the following URL:
http://hostname/testdrive/index.php?r=user
This will display a list of user entries in the User table. Since our
table is empty, nothing will appear at the moment.
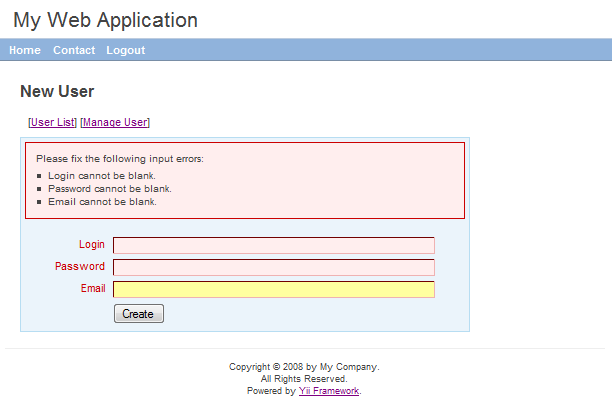
Click the New User link on the page. We will be brought to the login
page if we have not logged in before. After logged in, we are shown with
an input form that allows us to add a new user entry. Complete the form and
click on the Create button. If there is any input error, a nice error
prompt will be shown which prevents us from saving the input. Back to the
user list, we should see the newly added user appearing in the list.
Repeat the above steps to add more users. Notice that user list page will automatically paginate the user entries if there are too many to be displayed in one page.
If we login as an administrator using admin/admin, we can view the user
admin page with the following URL:
http://hostname/testdrive/index.php?r=user/admin
This will show us a nice table of user entries. We can click on the table header cells to sort the corresponding columns. And like the user list page, the admin page also performs pagination when there are too many user entries to be displayed in one page.
All these nice features come without requiring us to write a single line of code!
User admin page

Create new user page
Signup or Login in order to comment.